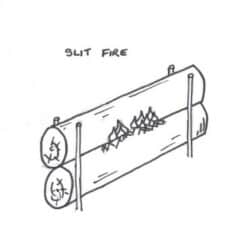
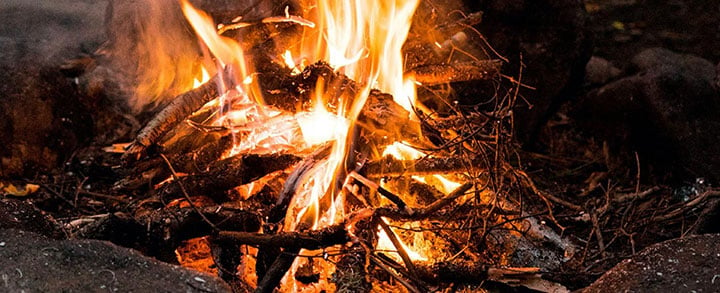
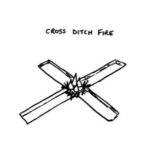
The cross ditch fire name does a pretty good job describing this fire, it is a cross of two ditches in the ground with a fire built in the middle.
This fire build is popular in survival and hunting as it is quick to build, creates a relatively well ventilated and protected fire and is adaptable to changing wind conditions.
Having a small well burning fire like this means it is quick and easy to build, cook on, extinguish, cover back so no one can see that you were even there (which should always be the case).
How to Build a Cross Ditch Fire
1/ Assess the location. This fire needs a relatively soft top soil so you can easily create the ditches. As always take into account the surroundings for fire hazards, wind direction and similar.
2/ Create the cross. Each ditch only needs to be about 4 inches/10cm wide and 2 inches/5cm deep. This can easily be achieved by scraping the back of your boot through the ground to create the indentation needed. The length can vary on the fire being made, but it’s main purpose is to encourage air flow, so a 2 feet/60 cm from the fire in every direction would be more than adequate.
These dimensions can be adjusted based on the conditions, if fairly windy, the length of the cross can be less and the depth deeper to create a better burning and protected fire.
3/ Lay the fire. The fir itself is small and can be any of the foundation fire lays like, tepee or log cabin. It is placed in the center of the cross, for quick burning, cooking and moving on it only needs to be small and the majority of it can fit in the crossover square. Only thing sticks and twigs are needed.
4/ Light the fire. Light the fire in the center, it should burn quickly and hot, with it being able to be boiled on quickly and without adding additional wood. If needed it to burn longer or use it as a heating fire then additional wood may need to be added.
5/ Maintaining the fire. This design and use is for quick set-up use and move on. If wanting it to burn longer then add wood as required, keeping it relatively small and in the center of the cross.
6/ Extinguishing the fire. This fire will burn out into itself fairly quickly. Continue to push any outlaying twigs or sticks to ensure they burn also. If still hot/warm and you are ready to move on, splash with water to cool then cover the ditches again with your boot, and flatten the surface, slight mound over the actual fire location. If done correctly it will not be possible to see you were there.
Cross Ditch Fire
Equipment
- hickory chips
- smoker
Materials
- wood
- matches
Directions
- Assess the location. This fire needs a relatively soft top soil so you can easily create the ditches. As always take into account the surroundings for fire hazards, wind direction and similar.
- Create the cross. Each ditch only needs to be about 4 inches/10cm wide and 2 inches/5cm deep. This can easily be achieved by scraping the back of your boot through the ground to create the indentation needed. The length can vary on the fire being made, but it’s main purpose is to encourage air flow, so a 2 feet/60 cm from the fire in every direction would be more than adequate.These dimensions can be adjusted based on the conditions, if fairly windy, the length of the cross can be less and the depth deeper to create a better burning and protected fire.
- Lay the fire. The fir itself is small and can be any of the foundation fire lays like, tepee or log cabin. It is placed in the center of the cross, for quick burning, cooking and moving on it only needs to be small and the majority of it can fit in the crossover square. Only thing sticks and twigs are needed.
- Light the fire. Light the fire in the center, it should burn quickly and hot, with it being able to be boiled on quickly and without adding additional wood. If needed it to burn longer or use it as a heating fire then additional wood may need to be added.
- Maintaining the fire. This design and use is for quick set-up use and move on. If wanting it to burn longer then add wood as required, keeping it relatively small and in the center of the cross.
- Extinguishing the fire. This fire will burn out into itself fairly quickly. Continue to push any outlaying twigs or sticks to ensure they burn also. If still hot/warm and you are ready to move on, splash with water to cool then cover the ditches again with your boot, and flatten the surface, slight mound over the actual fire location. If done correctly it will not be possible to see you were there.